top of page
Alessandro Rush
Product Design

Wilko Project

The task for this project was to design a hand-held screwdriver or an electric toothbrush in the style of the Wilko retail chain. Of the two I chose to design an electric screwdriver, since I felt it would give me a better chance to experiment by coming up with different forms.
Sketches
I started the project by making some sketches to develop different design form ideas for the product - I did this while referencing a screwdriver I had bought to ensure the interior parts would fit. From here I selected some of the designs and re-sketched them in further detail to see which I thought was best.
The best design was a wide-grip version. This has the advantage of being easily held by any user, including the elderly. There was one issue to be resolved, namely that the screwdriver was too short, so I extended the top part of the product to also enable the motor to fit more comfortably.
The final picture shows how the parts fit together.

1A

2

9

1A
1/9
CAD & Renders

The next step was to make a CAD model. This has 2 main shells forming the black body, a guard where the screwdriver bits can be exchanged, a trigger used to activate the motor and a sliding button to select the direction in which the screwdriver turns (the part in orange). The model has grooves on the top part of the casing to improve grip.
There is finally an opening on the bottom where the charging port can be plugged in to recharge the screwdriver.

The image above showcases how the model fully fits together with all the interior parts such as the battery, the motor and the direction switch. The parts are held in place by ribs that perfectly fit the different components. The model is then held in place by 5 screws that connect the two casing sections, whilst the button has a wider base so that it stays in place when the product is assembled.
Different renders of the model and its interior parts are shown below.

untitled.13

untitled.12

untitled.4

untitled.13
1/10
Model
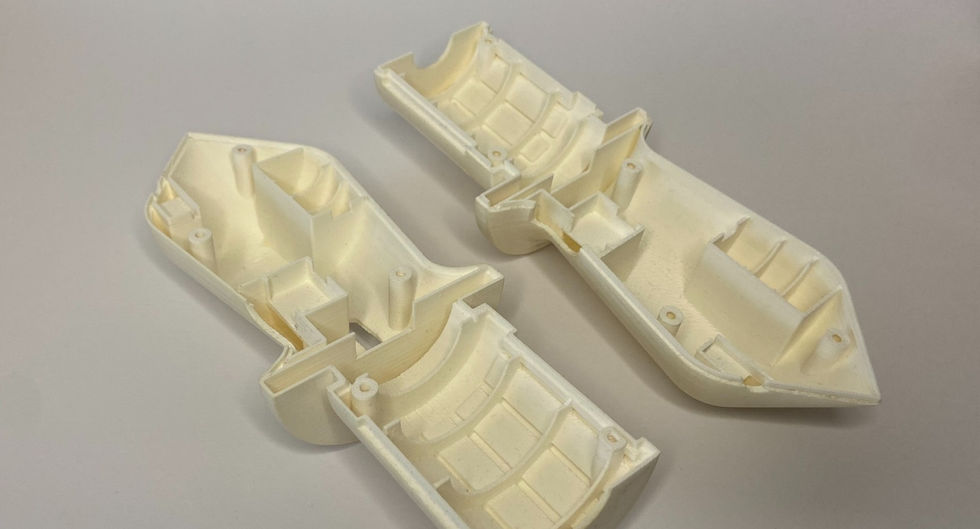
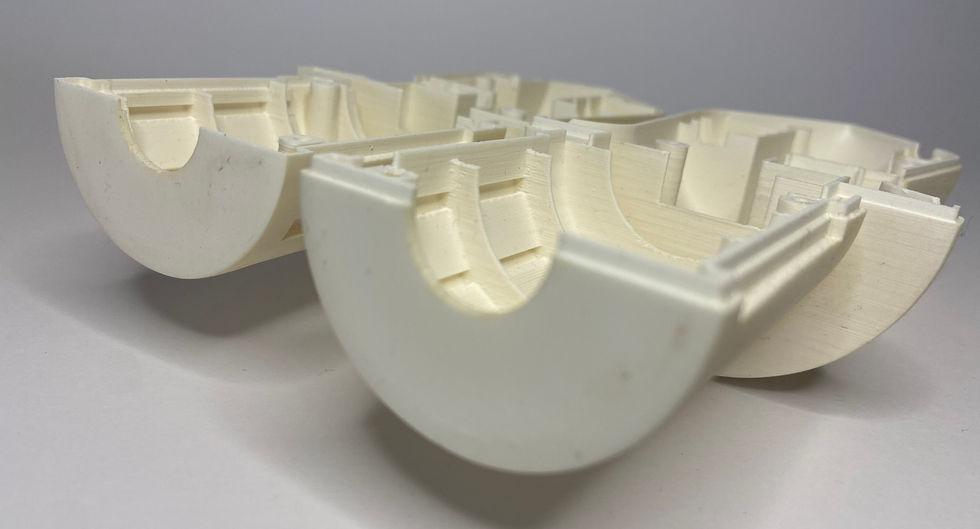
For this project we were tasked with creating a two-part casing model. To do this I used a 3D printer to give as much detail as possible. The model clearly shows all details such as the form, the ribs, the screw holes (with working thread) and the lip-and-groove fitting which matches perfectly when shut.

47127914_530565517419722_4870727637921693696_n

46524232_270178530357407_3128505365826633728_n

46695909_502935393523743_1643163971013836800_n

47127914_530565517419722_4870727637921693696_n
1/4
How the parts fit
Finally, I tried putting all the interior parts into the screwdriver to verify their fit and to check if the model could close and function.
All the interior parts fit perfectly in the model and sit securely in position. There is also perfect space and distancing for the wires. Once the model is closed it is possible to switch the motor on through the gap where the button would be located, and the product functions correctly.
To see more or to discuss possible work, let's talk >>
bottom of page


