top of page
Alessandro Rush
Product Design

STIHL Vacuum Cleaner

In this Project I was tasked with styling a hand-held vacuum cleaner with the visual characteristics of the STIHL company and then creating a full-size aesthetic model. This was a fully visual project and we were encouraged to be bold with our concepts.
Sketches
The sketching process started with a form concept generation stage in which I sketched out several different designs. At this stage I quickly used the brand colours to give the sketches a proper identity and to help identify the most appropriate proposals.
Design 1 and 6 were selected as the preferred designs. Some development work followed in which certain characteristics of the vacuum cleaners where further explored. Of the two alternatives, Design 1 - featuring a full handle and a hammer-head nose - emerged as my personal favourite.
Once the form had been decided the design had to be divided into its constituent parts, making sure that the motor, battery and dust collector components could be comfortably integrated into the model.
Finally, although the model was required to be an aesthetic rather than a functional product, I decided to showcase an exploded view of the two-part casing to illustrate how this was able to incorporate the theoretical motor and battery.

CAD
CAD modelling was needed to achieve the best possible physical model at the end of the project, giving me a better visual of the product and also enabling me to use a CNC machine to create the base form of more complex shapes such as the hammer-head nose and the ball part. This enabled me to create renders using KeyShot and to explore different looks and to
make changes to the
initial design.
Individual Parts
 HandleThe handle has been measured to fit comfortably in one hand the bottom of it attaches to the lower part of the Motor Housing and gives the handle structural support so it can hold the weight of the vacuum-cleaner. |  Motor HousingThis part contains the motor and is the location for the battery pack. The motor fits on the protruding part in the middle of the curve, added to allow more room for the motor. |  Duct CollectorThis part will be attached to the Motor Housing part, but i may add something to make the separation a little more realistic. |
|---|---|---|
 Top AestheticThis part was one of the most complex to model. it is only for aesthetic prepuces. |  NozzleThis part will be the connection between the Hammer-Head and the BALL PART (Dust Collector & Motor Housing) |  Hammer-HeadThe Hammer-Head part is where the air intake will be located, it is shaped this way for a aesthetics but also to maximize the air intake surface area |
Click on the images to see full descriptions

RENDERS
 |  |  |  |
|---|---|---|---|
 |
For the renders I entered the model into KeyShot and used the STIHL brand colours (white, grey and orange) in a way that I felt made the product stand out most.

MODEL MAKING
1- CNC:
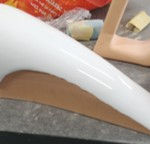
To begin I used a CNC machine to create all the main parts of the model and all the negatives for the vacuum forms.
2- Sanding:
Now all the parts were attached together using double-sided tape and glue, sanding the parts to achieve the desired finish.
3-Hammer-Head detail:
I sliced off a thin part of the hammer-head section and removed material from the bottom to make it look like air intake gaps, before re-attaching the slice to the top of the main hammer-head.
4-Vacuum Forming:
The aesthetic sheet and dust collector were made by vacuum forming the negatives. The parts where then trimmed to the correct size and sanded.
5-Primer Coating:
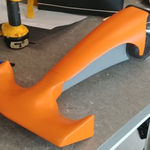
Now all the parts made out of chemical wood received several coatings of primer. After each coating the parts were sanded, and this process was repeated until they were smooth enough for final paint finishing.
6- Simple Additions:
While the primer layers were drying I added some thin rubber tubing around the duct collector to give the idea of an air-tight seal. I also 3D-printed a sliding button with a rubberized surface for where the thumb would be positioned.
7-Paint Job:
The different parts were spray-painted in the classic STIHL product colours: orange, white, grey, as well as black. The underside of the hammer- head was also painted black to give the idea of this part being hollow.
8-Assembly:
With all the parts created it was time for assembly. The parts were joined using double-sided tape and glue, with added support needed for the hammer-head. I therefore also included three pieces of dowel to help support the weight of the part.
9-Branding:
Finally, I added vinyl stickers with the STIHL logo to the sides of the model to ensure that the branding was clearly visible and understood.

FINAL MODEL
These are pictures of the final model.

_MG_4049

_MG_4050

_MG_4092

_MG_4049
1/9
To see more or to discuss possible work, let's talk >>
bottom of page


